Convert IMG Data to BIL with ESRI ArcGIS Python Scripts
| Step | Description | Screenshot | ||||
| 1a | Obtain IMG Data: Step 1 | 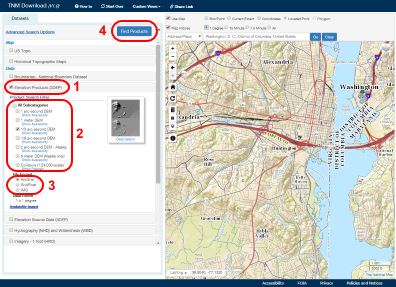 |
||||
| The primary method for downloading The National Map (TNM) raster IMG (3D Elevation Program (3DEP) 1-, 1/3-, or 1/9-arc-second) type of staged products is by using the new TNM download client (http://viewer.nationalmap.gov/basic/). Zoom to the area of interest. Select "Elevation Products (3DEP)" from the Datasets section on the left (1), then a subcategory (2) and IMG file format (3). Finally, click on the "Find Products" button (4) to bring up the available products. | ||||||
| 1b | Obtain IMG Data: Step 2 | 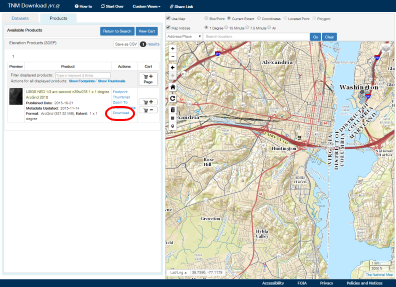 |
||||
| When the Available Products window appears, click on "Download" to download the IMG in a zip file. Once downloaded, unzip the file locally, making note of the location. | ||||||
| 2 | Obtain USGS Raster Conversion Scripts | 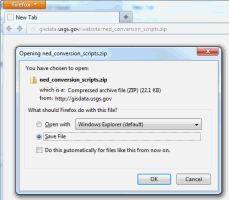 |
||||
| A set of scripts for converting raster staged data is available at USGS_Raster_Conversion_Scripts. These should be downloaded and unzipped locally. (These directions are part of the how to documentation in that archive.) | ||||||
| 3a | Option 1: Drag and Drop IMG Download Folder | 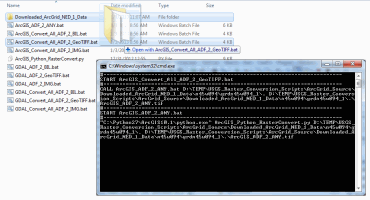 |
||||
| The ArcGIS_Convert_All_IMG_2_BIL.bat script takes a folder name as input and recursively scans that folder for all TIF files and attempts to create a BIL for each. In Windows Explorer, when you drag and drop a folder onto a batch file, the folder path is passed as the parameter to run that batch file with. Doing this produces a BIL in that same folder as the IMG data. The resulting image(s) will have the name ArcGIS_IMG_2_ANY.tif.
In order to use this method, download the Esri ArcGIS scripts into a user-controlled directory with write permissions. Drag and drop the original IMG file from the same directory that the conversion script is located in. |
||||||
| 3b | Option 2: Run the ArcGIS_IMG_2_ANY.bat from the Command Line | 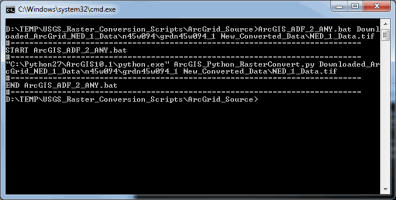 |
||||
|
The ArcGIS_IMG_2_ANY.bat file uses a TIF file location for the first parameter which is the source to convert. This script will not recursively scan the sub-directories to find the data, so the path must point to the actual IMG file. A second parameter that is optional allows you to specify the path and name of the output IMG file.
Since the second parameter is optional, the easiest way to run this is to drag and drop the ArcGrid data folder onto the batch file. The catch is that the default conversion is to BIL format. This means to get an IMG output, we need to specify the second parameter by running this from the command line. The script uses the file extension of the second parameter to determine the correct output type. The directions for using this script are presented below:
|
||||||
![]() U.S. Department of the Interior |
U.S. Geological Survey
U.S. Department of the Interior |
U.S. Geological Survey
Page Contact Information: The National Map
Page Last Modified:
